Tuesday, September 30, 2008

Organizing the Bedroom Closet

Now, I know that is doesn't look like much but...


In my defense, I need to go through it to make a shopping list. And, the shoes were a mess, my purses need to be restuffed with tissue paper and I did carry out 3 bags of clothes to either give away or toss. So, I think it was successful. What do you think?


Monday, September 29, 2008

Susie's Homemade Honey Molasses Dinner Rolls

If you recall last week, I published my French Menu for a dinner party this past weekend. Well, the party was a HUGE success!!

These are my Homemade Honey Molasses Dinner Rolls that I served with this menu. I should probably call them Semi-Homemade because I do make the dough in a bread machine. I am sorry if I am offending any one's sensibilities with this but, I can not knead bread to save my life.


Susie's Homemade Honey Molasses Dinner Rolls

Ingredients:
3/4 cup milk
1/4 cup butter
1 egg
1/2 tsp salt
1/4 cup sugar
2 tbls molasses
2 tbls honey
3 cups flour
1-1/2 tsp bread machine yeast
1 egg white plus 1 tbls water beated together for egg wash.

Directions:
1. Add of the ingredients except the flour and the yeast to the bread machine. Add the flour and make a little hole for the yeast. Add the yeast. Select the dough cycle on your bread machine per the manufacturer instructions.
2. Once the dough is complete, pour the dough on to a floured surface. Make 16 balls (2 oz. each). Roll each ball into a 12-inch long rope. Tie the "ropes" into a pretzel shape and tuck the ends underneath. Brush each roll with the egg wash. Let rise for 30 minutes.
3. Brush each roll with egg wash again. Bake at 375 degrees for 15 minutes. For best results, serve immediately or store in a food storage bag once they are cooled.
16 servings


Print

Friday, September 26, 2008

Friday's Foto Fun with Art

It's time for Carrie's Friday Foto Fun:-)


We had some beautfiul weather here in Wisconsin. So, my youngest and I hit the sidewalk with some chalk. I thought it would be nice to spread some of our rainbow cheer with you today.


AND...

I couldn't resist showing you my portrait!! This is what Mommy looks like through the eyes of my young artist:-) I love it because she is my ray of:

Thursday, September 25, 2008

And a Partridge in a…


This is my pear tree in our backyard. This year, we had so many pears, the branches were bending under the weight of the fruit. Here are a couple of these beauties:


Aren’t they gorgeous? I love to poach them in wine but my mother-in-law uses them in apple pies! I have tried them and you can not tell the difference.

Tuesday, September 23, 2008

Organizing the Breezeway Closet

This weekend, I tackled our breezeway closet. This is closet is required to hold anything from pool toys to flower pots to winter boots. With all those requirements, this space can easily become this:


After an hour…ta da….


Go see what other people are tackling at 5 Minutes for Mom .

Monday, September 22, 2008

Beef Burgundy Over Herb Egg Noodles

Thanks to my wonderful Internet provider; I do not have Internet access at my house. So, since I am not doing this locally, I don’t have any pictures for you this morningL

However, I am throwing a dinner party for my uncle this weekend and in lieu of pictures, I am going to share my whole menu with you. Then, over the next couple weeks, I will post all the other recipes and pictures. Deal? Great, I knew you would be ok with thatJ

Here is my French Menu:
Barefoot Chardonnay for the First Two Courses
Susie’s Homemade Molasses Dinner Rolls
French Onion & Fontina Cheese Soup with Susie’s Homemade Ciabatta Bread Croutons
Leafy Greens with Apples and Dijon Mustard Vinaigrette

Burgundy Wine for the Main Course
Beef Burgundy Over Herb Egg Noodles (see the recipe below)

French Vanilla Coffee for Dessert Course
Grandma’s Homemade Pecan-Filled Butterhorns with Sugar Glaze

To kick off my recipe postings, here is the Main Course:

Beef Burgundy Over Herb Egg Noodles
Ingredients:
3 lb. Beef chuck or round steak cut in about 1” cubes
3 tbsp butter
1 tbsp flour
1 cup Burgundy
10-½ oz. can beef stock
3 or 4 sprigs fresh sage
3 or 4 sprig fresh thyme
3 slices bacon
2 medium onions sliced
12 oz wide egg noodles
2 tbsp unsalted butter
¼ cup chopped fresh parsley leaves
12 blades fresh chives snipped or finely chopped (plus extra for garnish, if desired)

Directions:
1. Brown meat in butter in a deep and heavy skillet. Add flour and stir while cooking for 2 to 3 minutes. Add burgundy, beef stock and seasoning. Bring to a boil. Reduce heat and simmer covered for 2 hours. Check while simmering and add liquid as necessary.

2. Fry onions and bacon together until onions are lightly browned. Drain fat and add to meat along with mushrooms. Let simmer for another 30 minutes.

3. Meanwhile, prepare the egg noodles to the package directions. Toss hot egg noodles with butter and herbs.

4. To serve, place a bed of noodles in a shallow bowl and pour beef burgundy over the noodles. Garnish with fresh chives, if desired.

Serves 6

Friday, September 19, 2008

Thanksgiving Party Planning

Well, I posted my daughter's first tablescape last week so, I thought that I would show you where this talent came from.


This is our table from last Thanksgiving. I was especially proud of this set up because all of the elements came together nicely. My grandmother's china looks very regal next to the gold chargers and the burgundy table cloth. I love fresh flowers for a centerpiece. I designed this arrangement for less than $10 from our grocery store. My favorite part were the pumpkins. They were Pumpkin Gingerbread Bundt Cakes and they were very yummy and I thought they really completed the setting.

I am starting to party plan for the holidays and I needed some inspiration. You know...get the creative juices flowing. I think this may do the trick:-)

Thursday, September 18, 2008

Saving the Season

It's canning season!! I have nurtured these babies from seed to mature bountiful plants. Now, the fruits of my labor is paying off into great things like Susie's Homemade Salsa:-) Yummo:-)


I don't really trust the canning process. I am too scared of botulism. Instead, I can them up and freeze them (that's why the picture is funny...I took it after freezing it...duh). It's another labor of love.

First, the tomatoes. I seed them and then, carefully take the seeds and rinse them off. It takes a while to do this because there is a little membrane that has to come off. Once they are dried, I wrap them in a paper towel and put that into a labeled food storage bag. Into the frig they go until next season. Viola!! Instant heirloom tomatoes. Ok...not instant but it's pretty cool. I never have to buy tomato seeds again!

Next, I make the salsa. I boil the tomatoes and then add Susie's Homegrown green peppers, hot peppers, onion, garlic and parsley. Then, in goes the vineager, sugar, salt and pepper. I bring it to a boil again and then dip the pot into an ice bath. This helps to bring the temperature down. Then, I ladle the completed salsa into sterilized 1/2 pint jars (leaving a 1/2 inch headspace), label and then freeze.

I got to tell you, it feels great to have my own homemade salsa to munch on during the Super Bowl:-) Nothing quite like it:-)

Wednesday, September 17, 2008

More Kudos for Me:-)

Some of my fellow bloggers felt compelled to share an award with me this week. Isn't that nice?

Can't Hardly Wait gave me this nice award:

It is Portuguese for "This Blog invests and believes... the proximity." I think it supposed to translate to "This blog brings us closer":-) That's a nice thought:-)

I also got this beauty from Jill Scott at Controlling My Chaos :


Now, I get to pass on the love. Let's see...

1. Thotlady : I like her. She does just what her name says...makes me think:-)

2. Buried with Children : Even though she is literally buried in children, she still finds time to share her life with us and even write a comment or two:-)

3. Miss Hollywood : I just met her this week at Iron Cupcake: Milwaukee and she is a big sweetheart!!

4. Mamasphere : She is also a new friend that found me online:-) She is a sweetie too:-)

5. Zander and Me : Got to love Z's Mom:-)

So everybody, go out and give these gals a visit. Tell them Susie sent you:-)

Tuesday, September 16, 2008

Calatrava Cupcakes

Yesterday, I competed in the Iron Cupcake: Milwaukee bake-off. The theme was Milwaukee and the idea was to create a cupcake that tells a story about our fair city. I take my baking very seriously and after my initial set back , I was determined to find an adequate entry. So, I worked the weekend and I think I found it.

Several years ago, our skyline was redefined when the art museum went through a major renovation that included an innovative design by Santiago Calatrava. Here is that design:


And here is my interpretation of that design in cupcake form:
Calatrava Cupcake
I thought that this was a really unique idea...until I saw the logo for this competition had the Calatrava right on there!!


So much for thinking outside the box! Oh well, I had fun and it was a great tackle!

Friday, September 12, 2008

Chip Off the Old Block


This is my youngest daughter's first tablescape. She even has flowers on the table!! How cute is that!! The apple doesn't fall far from the tree.

Thursday, September 11, 2008

Fall Plants

It's time for Gardening Thursday. Today, I am going to show you around my fall planters.

When the cold weather strikes, it is important to take those summer plants out and replace them with hardy falls plants. You saw my Fence Garden a couple weeks ago and this is the one place that I do have a 3-season plan (white pots for spring and summer, orange pots for fall and green pots for winter).

On the ends, I have ornamental Kale. I love the deep purple color and it adds a different texture to the arrangments.


And of course, you have to do mum in the fall. They are colorful and hardy. The cooler it gets, the better they do. When buying mums, make sure to get plants that are packed tight together and still have a lot of closed buds. Also, make sure you keep these guys moist. They do not like to be dry. Follow these few easy instructions, and you can enjoy them well into the season.


I really like this 3-season plan and I would like to duplicate it in the other sides of the house. So, over the next couple years, I am going to be buying up large pots for the Bush Garden and hanging pots and small pots for the Tropical Garden . Wish me luck:-)

Tuesday, September 9, 2008

Indoor Gardening

We tackled our basement this weekend to go along with 5-Minutes for Mom Tackle It Tuesday . We cleaned out all of our storage shelves because my husband bought me a grow light for my birthday (back in May). So, we finally got around to setting it up and here it is:

I can't wait to get started. The shelving unit with the reflective paper is for seedlings and I have used this for 2 years to feed my outdoor garden. The success of this set up lead to the grow light. Now, I can plant seedlings year round and bring plants to maturity under the new light. I am so excited!!! I haven't decided what I am going to plant yet but, I will be sure to blog about it when I do:-)

Monday, September 8, 2008

Susie's Homemade Apple Pie

As promised, this is my apple pie.

Susie's Homemade Apple Pie

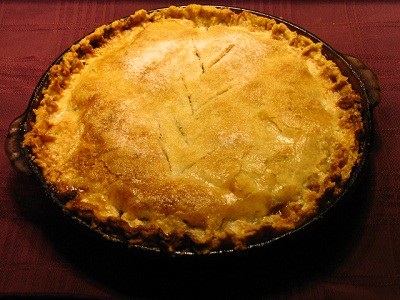
When it comes to pies, I am more of a purest in terms of design. I really like the rustic look and the flavor speaks for itself. So, go pick some apples and try this recipe today:-)

Susie's Homemade Apple Pie
Fail Proof Pie Crust (See Recipe Below)
6 cups apples, peeled, thinly sliced
3/4 cup sugar plus additional sugar for top crust
2 tbls flour
1/2 tsp cinnamon plus
1/8 tsp nutmeg

1. Preheat oven to 375 degrees.

2. Prepare the pie crust recipe. Line 9-inch pie plate with 1/2 the recipe.

3. In a large bowl, stir together sugar, flour, cinnamon and nutmeg. Add apples and gently toss. Transfer apples to pastry lined pie plate. Cover with remaining pie crust. Brust crust with enough milk until it pools in places. Sprinkle generously with sugar and cinnamon. Cut slits in the crust for venting.

4. Shield the edges of the crust with aluminum foil. Bake for 25 minutes. Remove foil and bake for 25 to 30 more minutes or until top is golden brown. Cool on wire rack.

Servings: 8

Cooking Times
Preparation Time: 10 minutes
Cooking Time: 1 hour
Total Time: 1 hour and 10 minutes

Nutrition Facts
Serving size: 1/8 of a recipe (8.1 ounces).
Percent daily values based on the Reference Daily Intake (RDI) for a 2000 calorie diet.
Nutrition information calculated from recipe ingredients.

Amount Per Serving
Calories 706.1
Calories From Fat (43%) 302.54
% Daily Value
Total Fat 33.68g 52%
Saturated Fat 11.83g 59%
Cholesterol 48.74mg 16%
Sodium 13.51mg <1>
Recipe Cost: $4.26
Serving Cost: $0.53

And, if you have left over pie crust, make Poor-Man Cookies. It is another recipe my mother-in-law gave me. She got it from her mother. They grow up on a farm in Kansas and nothing was wasted...NOTHING. Besides recycling pie crust, they are really good. Give this a try:
Directions:
1. Roll out leftover pie crust on a cookie sheet.

2. Brush with enough milk until it pools in places.

3. Generously sprinkle with sugar and cinnamon.

4. Bake at 375 degrees until golden brown.

5. Break into pieces and enjoy.
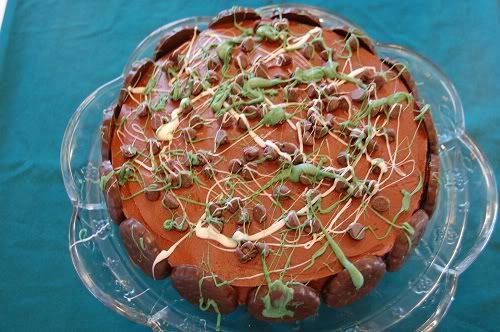

Print

Friday, September 5, 2008

Friday's Foto Fun with Produce

Time for Carrie's Friday Foto Finish Fiesta !!

This week, I am tantalizing you with a single crisp and succulent apple from my apple tree.

There is nothing quiet like going in your back yard and plucking a beauty like this and sinking your teeth into the rosy red skin with a crunch into the snow white juicy center.

Hungry? Good:-) Come back Monday for Susie's Homemade Apple Pie Recipe:-) In the meantime, I leave you with Big Yellow Taxi:

"Hey farmer, farmer, put away your DDT. I don't care about spots on my apples, leave me the birds and the bees - please"

Thursday, September 4, 2008

Tropical Garden

It's time for Gardening Thursday:-) This week, we are visiting my backyard or what I like to call my "Tropical Garden".

I call it that because that is where we keep the pool in the summer. The pool, having water and all, lends itself to the tropical theme. I have 2 kinds of ferns back there and what I call "Banana Leaf" hostas. They look like palm tree tops planted in the ground.
I also have my husband's Jades back there. These actually have an interesting story.

My husband's paternal grandmother had a beautiful Jade back in their hometown of Cincinnati. The family had taken several cuttings from it on different occasions however, they never seemed to take. They tried on last time at Grandma's funeral. After they came home, the Jades finally grew! Then, the uncles called and reported that Grandma's Jade finally retired. It was like she wasn't willing to leave Cincinnati and then when it was time to go, she lived on here in that Jade.

And, as one of the newest members of the family, I took my own cutting off of my husband's plant. I have successfully grown my own Family Jade in a pot that I bought in Mexico on our honeymoon. Kind of fitting, don't you think? My husband says it's like getting Grandma's approval:-) Thanks, Grandma! I love your grandson very much:-)

Thanks for spending Thursday with me gardening. Next week, we will take a look at my fall plants:-)

Wednesday, September 3, 2008

What I Packed for Lunch

It's my youngest daughter's first day of preschool today. Instead of posting a picture of her, I decided that as resident foodie, I should post what I packed in her first lunch.


With this being her first day, I went completely traditional: a peanutbutter and jelly sandwich, apple sauce and juice. Pure, simple and it is the most likely to be consumed among the excitement that is preschool.

Also, I have chocolate chip cookies and milk waiting for her to get home. It is so June Cleaver of me but, it has been a dream of mine and I got to do it today:-)

I love you Baby, congratulations on your first day in the real world. I missed you like crazy! And you were:

Monday, September 1, 2008

Tackling All Over the Place

This room is our "Catch All" room. Anything that is coming in gets parked here. Anything that needs to go out gets parked here. Anything that is going nowhere gets parked here.

With school starting on Wednesday, I really needed to get this area organized. A well-organized entry to your home, helps the whole home run a little better. I think it turned out pretty good. Don't you think?


BEFORE

AFTER

Chocolate Cabby Cupcake Recipe


In the meantime, here is a recipe:-) I have had a lot of requests for the recipe for my Iron Cupcake: Milwaukee entry. I am not one to disappoint my adoring public, so, here it is in all its glory:-)

Chocolate Caddy Cupcake

For the Cupcake:
1 cup butter
1 cup sugar
4 eggs
1 tsp vanilla
12 oz semi-sweet chocolate chips
2 tsp baking powder
2 1/4 cups flour
1/2 cup Cabernet wine
4 tbsp unsweetened cocoa powder

For Frosting:
1 container of ready-made chocolate cheesecake

For Sauce:
1/2 pt. raspberries, plus 24 more for garnish
1/2 cup Cabernet wine
1/4 cup sugar

1. Preheat oven to 350 degrees. In large bowl, mix butter, sugar and eggs until smooth and creamy. Add vanilla and chocolate chips and mix well.

2. In a small bowl, mix baking powder and flour. Add to creamed mixture. Add wine and cocoa and mix well. Bake for 30 minutes.

3. While the cupcakes are baking, make the sauce. Bring all ingredients to a boil. Strain and cool.

4. To assemble, frost cupcakes with the frosting when they are completely cooled. Top with extra raspberries and then the sauce. Enjoy.

Makes 24 cupcakes

View My Stats
Related Posts with Thumbnails

What's For Dinner?

 
Powered by Blogger